
Data Extractor
Introduction
Data Extractor extracts command and telemetry items into comma or tab separated files. Individual items or entire packets can be processed over any time period. Data Extractor also has a number of options to control the output for post processing in Excel or Matlab, for example.
Data Extractor Menus
File Menu Items
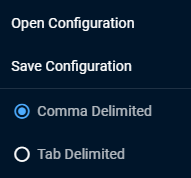
- Opens a saved configuration
- Save the current configuration (item list)
- Delimit output with commas
- Delimit output with tabs
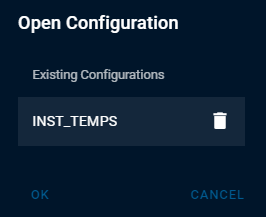
Open Configuration
The Open and Save Configuration options deserve a little more explanation. When you select File Open the Open Configuration dialog appears. It displays a list of all saved configurations (INST_TEMPS in this example). You select a configuration and then click Ok to load it. You can delete existing configurations by clicking the Trash icon next to a configuration name.
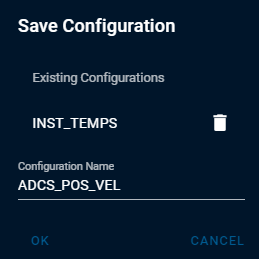
Save Configuration
When you select File Save the Save Configuration dialog appears. It displays a list of all saved configurations (INST_TEMPS in this example). You click the Configuration Name text field, enter the name of your new configuration, and click Ok to save. You can delete existing configurations by clicking the Trash icon next to a configuration name.
Mode Menu Items
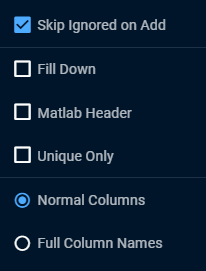
- Skip ignored items when adding targets or packets
- Fill empty cells with the previous value
- Add a Matlab comment (‘%’) to the header
- Only output changed values
- Only list item name as column header
- List full Target Packet Item as header
Selecting Items for Output
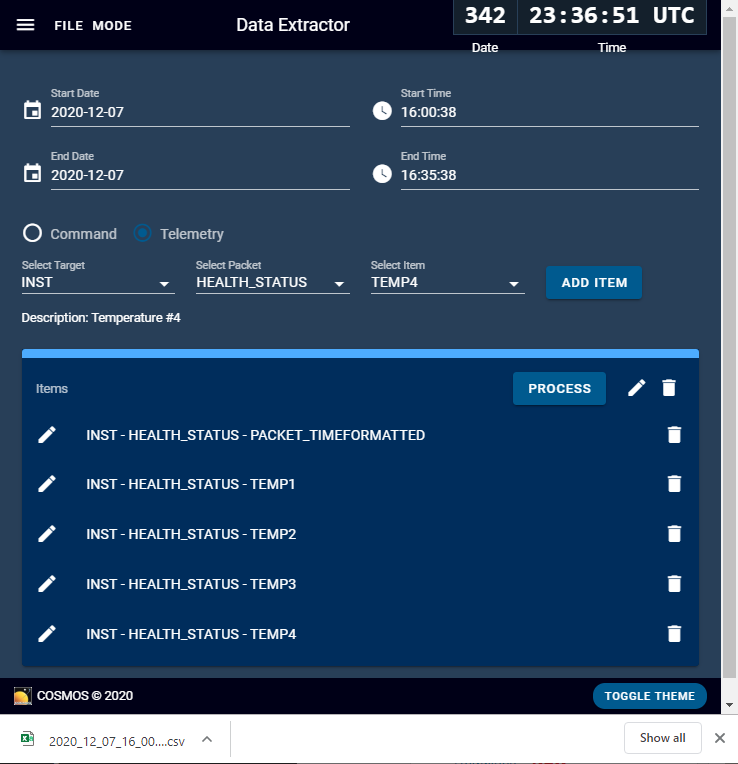
Start/End Date/Time
Data Extractor provides text fields where you specify the time range to extract items. Clicking the Start Date and End Date text fields opens a Date Chooser dialog. Note you can also manually type in the date.
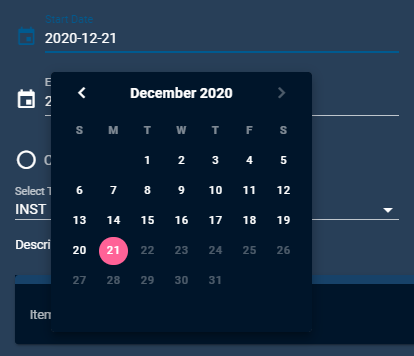
Start Time and End Time are simple text fields. If you enter an invalid time, Data Extractor will warn you and indicate the correct syntax.

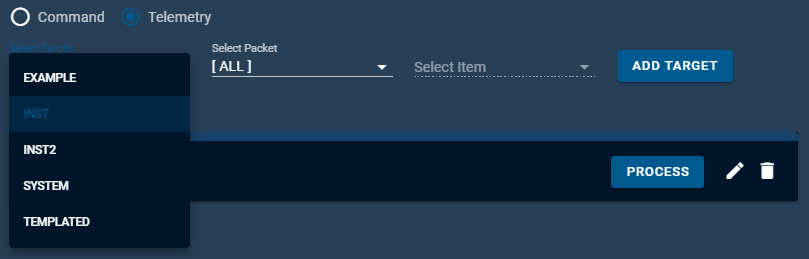
Adding Targets Packets Items
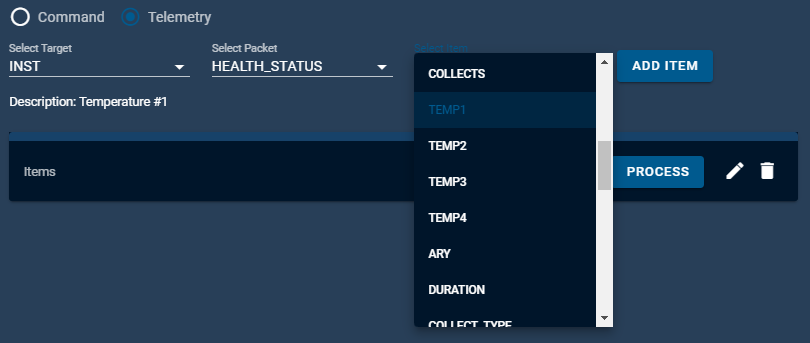
Data Extractor provides Target, Packet, Item drop downs to select the items you want to export. When you select a Target the Packet drop down defaults to [All] which sets the button to “Add Target”. This would add EVERY item defined in EVERY packet in the target. Note: This can be a LOT of telemetry points but any added point can be removed.
When you select a Packet the Item drop down defaults to [All] which sets the button to “Add Packet”. This would add EVERY item defined in the specified packet. Note: This can be a LOT of telemetry points but any added point can be removed.
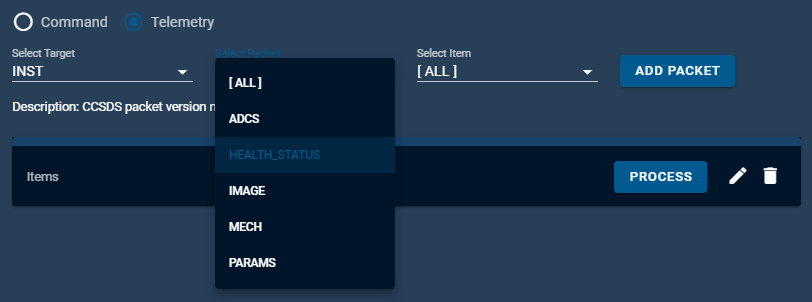
When you select an individual Item the button changes to “Add Item” and the Description field updates with the item’s description.
Removing Items
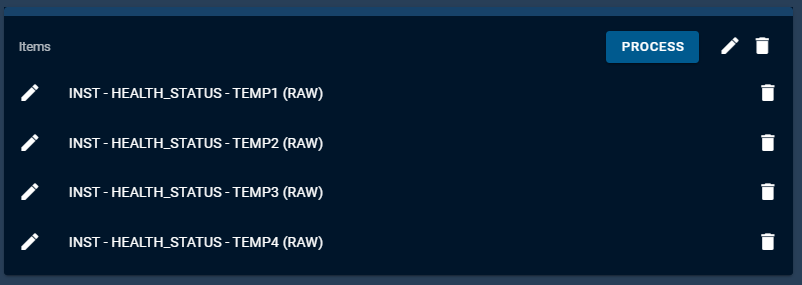
Once you’ve added items the Items table will have a list of items.
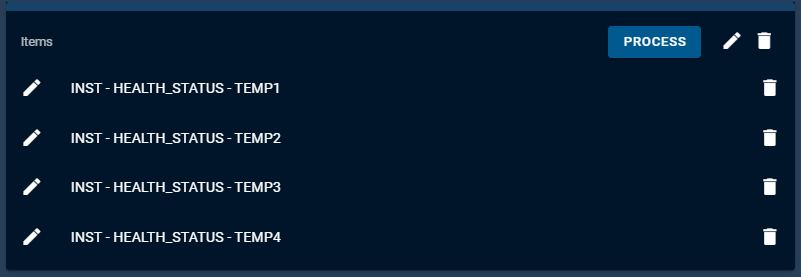
Items can be removed by clicking the Trash icon next to the item. ALL items can be removed by clicking the Trash icon in the header.

Editing Items
Items can be edited by clicking the Pencil icon next to the item. ALL items can be edited by clicking the pencil icon in the header.
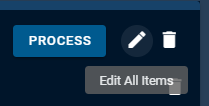
Clicking the Edit All brings up the Edit All Items dialog.
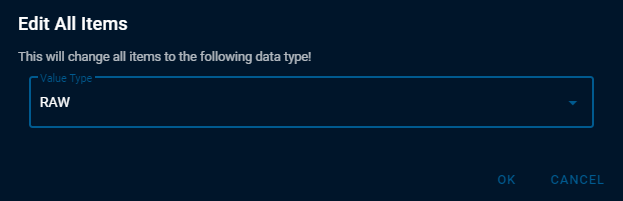
This allows you to change the data type of all items in the list. In this example we change from the default of CONVERTED to RAW. This updates the item list as follows.
Clicking the pencil next to an individual item brings up a similar dialog.
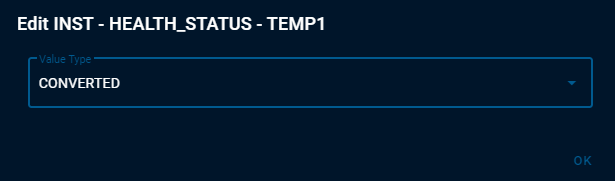
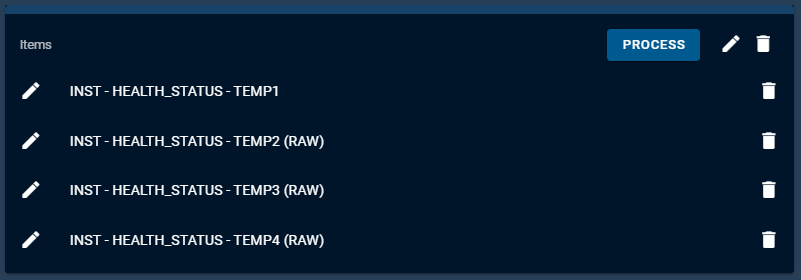
If we change TEMP1 back to CONVERTED the item list is again updated. Note that (CONVERTED) is not shown as this is the default output.
Processing Items
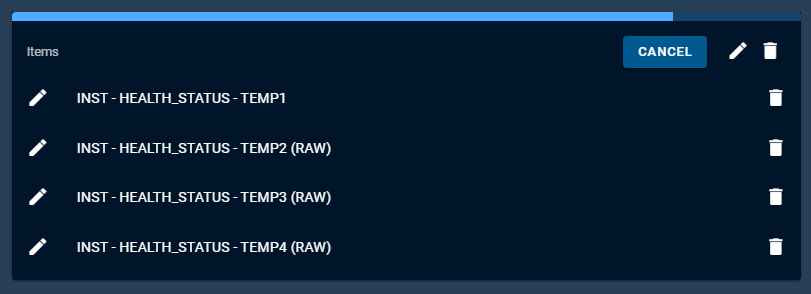
Clicking the Process button starts the processing of the items list. A progress bar is shown above the table and the Process button changes to Cancel to allow cancelling the process.
When the processing is complete, the browser shows a file download link. Note this varies by browser. This example is from Chrome.