
COSMOS is a GUI application which runs equally well on Windows, Linux, and Mac OS X due to the QT GUI framework and Ruby language it is written in. Traditionally this means you install it locally on your own workstation and you’re off and running. But can COSMOS also be deployed to the cloud? Yes! This post describes how I deployed COSMOS to Amazon Web Services (AWS) using several different technologies.
AWS
AWS consists of a lot of different services. To deploy COSMOS you need to create an AWS EC2 instance. The first step is to sign up for AWS which enables you to use their Free Tier for 12 months. This includes 750hrs each on Linux and Windows Server.
Deploying to Windows Server
Deploying to Windows Server is probably the easiest way to get COSMOS in the cloud. Simply create a Windows Server instance by selecting the following image:

Then select the t2.micro Type which is marked “Free tier eligible”. Launch the Instance and you should see the key pair dialog:
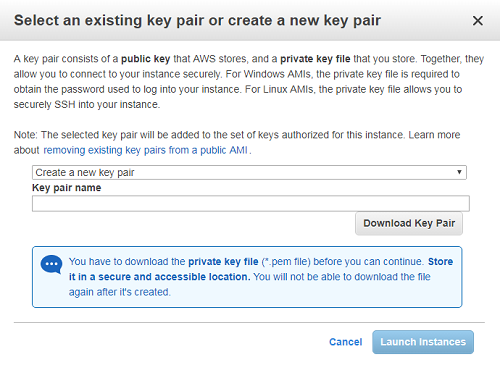
Create a new key pair and give the name something generic because you can use the same key pair for all the EC2 instances you create. Create the instance and then View Instance which will show the instance status. Click the Connect button at top which will bring up the Connect dialog:
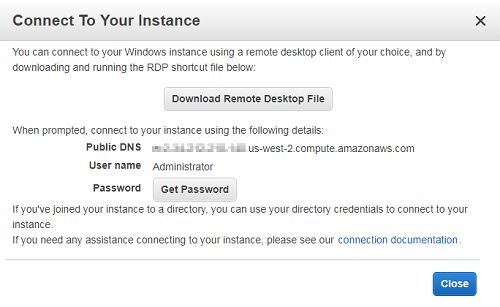
Click the Download Remote Desktop File and open it in Remote Desktop to connect to the Windows Server instance. Note that it does take a while for the Windows instance to boot so this won’t work until your Status Checks show a green check. Also note that many corporate firewalls may block doing a Remote Desktop outside your corporate network.
You also need to click Get Password and locate your ‘pem’ file you saved earlier to Decrypt your password. Login to the instance as Administrator with the decrypted password. Once you’ve logged in you can change the password to something a little more reasonable. Then simply follow the usual COSMOS installation instructions.
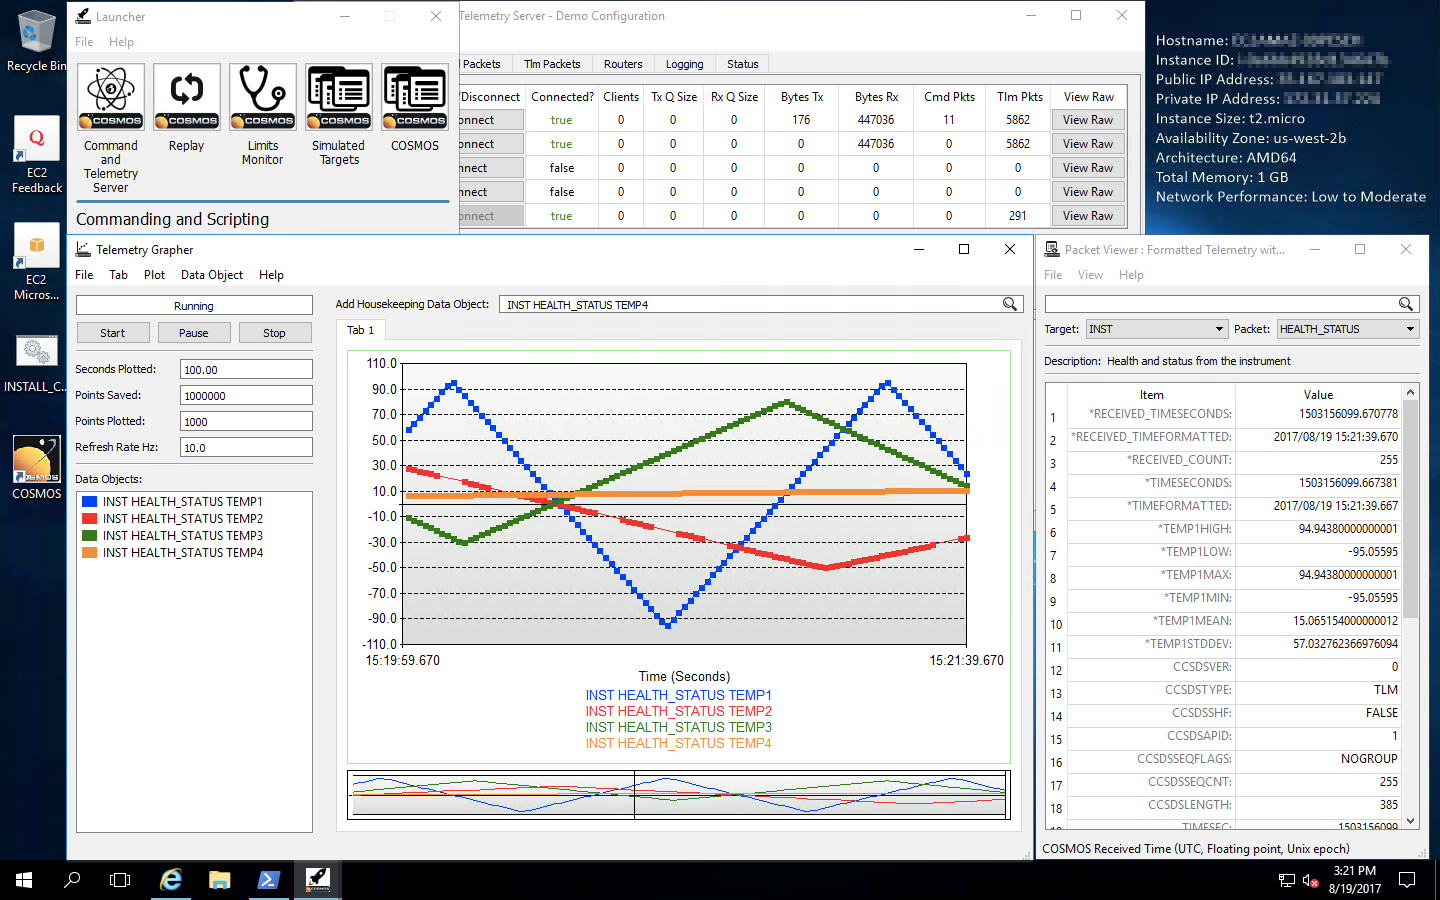
Here is a screenshot of my successful COSMOS installation running on the AWS Microsoft Server instance:
Deploying to Red Hat Linux (with X forwarding)
Deploying to Red Hat Linux is similar to Windows. Create a Red Hat instance by selecting the following image:

Use the same key pair when creating your Windows instance and create the instance. View Instance and click the Connect button which brings up the Connect dialog:
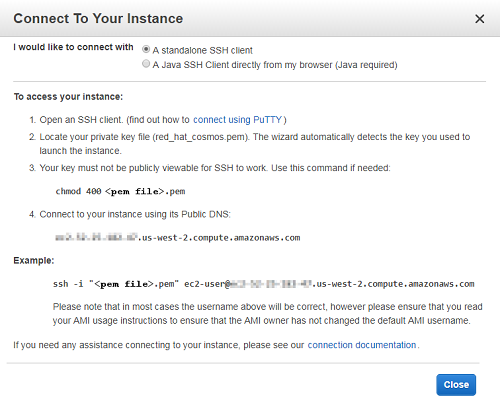
SSH to the instance using the connection string provided making sure to specify the full path to your ‘pem’ file in the quoted path after the -i option. Install a GUI by issuing the following command:
sudo yum groupinstall 'Server with GUI'
Install COSMOS using the installation bash file:
bash <(\curl -sSL https://raw.githubusercontent.com/BallAerospace/COSMOS/cosmos4/vendor/installers/linux_mac/INSTALL_COSMOS.sh)
Chose the sudo option when asked how to install. To enable X forwarding edit the SSH config file:
sudo vim /etc/ssh/sshd_config
Enable the following settings:
X11Forwarding yes
X11DisplayOffset 10
X11UseLocalhost no
Close your current SSH connection and reconnect with SSH adding the -X option to enable X11 forwarding and -Y to enable trusted X11 fowarding. If you host OS is Mac OS X you’ll need to install XQuartz. Linux has X11 forward support built-in. Windows should probably install Xming which is an exercise left to the reader.
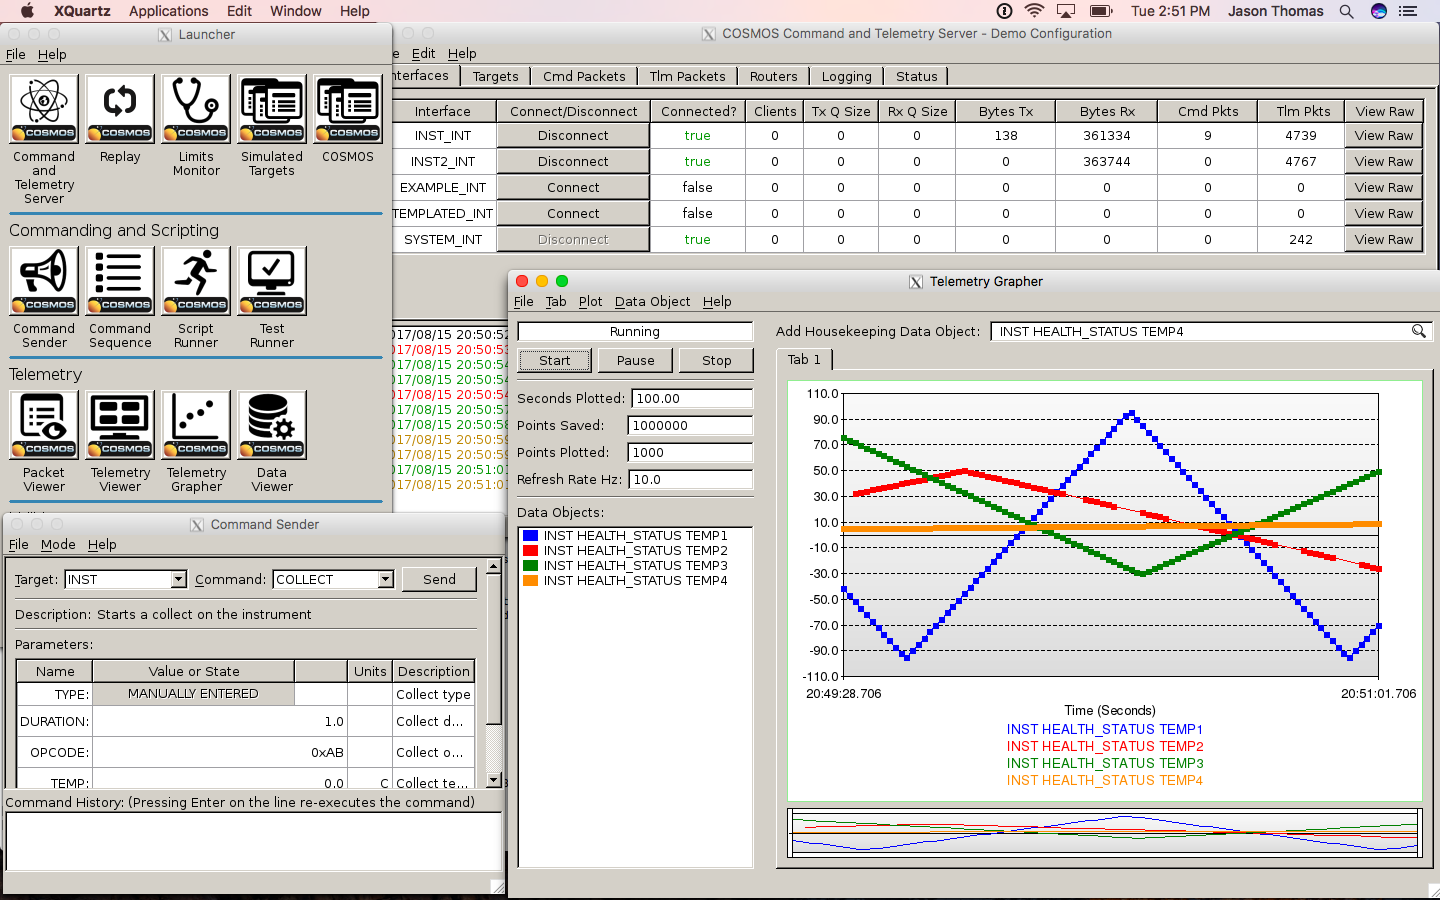
Now launch COSMOS and you should see the COSMOS windows appear on your own machine. While this approach works I found the performance to be significantly slower than VNC. Here is a screenshot of it running while I connected via a Mac OS X machine:
Deploying on Ubuntu (with VNC)
Deploying to Ubuntu Linux is very similar to Red Hat. Create an Ubuntu instance by selecting the following image:

Use the same key pair as when creating your Windows or Red Hat instance and create the instance. View Instance and click the Connect button which brings up the Connect dialog:
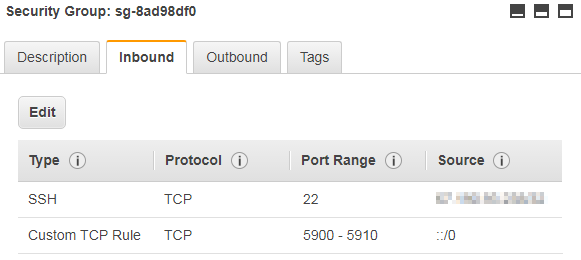
Click on the instance and click the Description tab which appears below the instance. Click the link next to Security groups to open the Security Groups configuration. Click the Inbound tab and create Edit to create a new Custom TCP Rule to enable TCP traffic on Ports 5900-5910 from Anywhere. Your rule should look like the following:
SSH to the instance using the connection string provided making sure to specify the full path to your ‘pem’ file in the quoted path after the -i option. Install a GUI by issuing the following command:
sudo apt-get update
sudo apt install xfce4 xfce4-goodies tightvncserver
Run the following commands to setup the VNC server:
vncserver
vncserver -kill :1
vim ~/.vnc/xstartup
Ensure your xstartup file matches the following:
#!/bin/sh

# Uncomment the following two lines for normal desktop:
unset SESSION_MANAGER
# exec /etc/X11/xinit/xinitrc
unset DBUS_SESSION_BUS_ADDRESS
startxfce4 &

[ -x /etc/vnc/xstartup ] && exec /etc/vnc/xstartup
[ -r $HOME/.Xresources ] && xrdb $HOME/.Xresources
xsetroot -solid grey
vncconfig -iconic &
#x-terminal-emulator -geometry 80x24+10+10 -ls -title "$VNCDESKTOP Desktop" &
#x-window-manager &
Restart VNC:
vncserver
Install COSMOS using the installation bash file:
bash <(\curl -sSL https://raw.githubusercontent.com/BallAerospace/COSMOS/cosmos4/vendor/installers/linux_mac/INSTALL_COSMOS.sh)
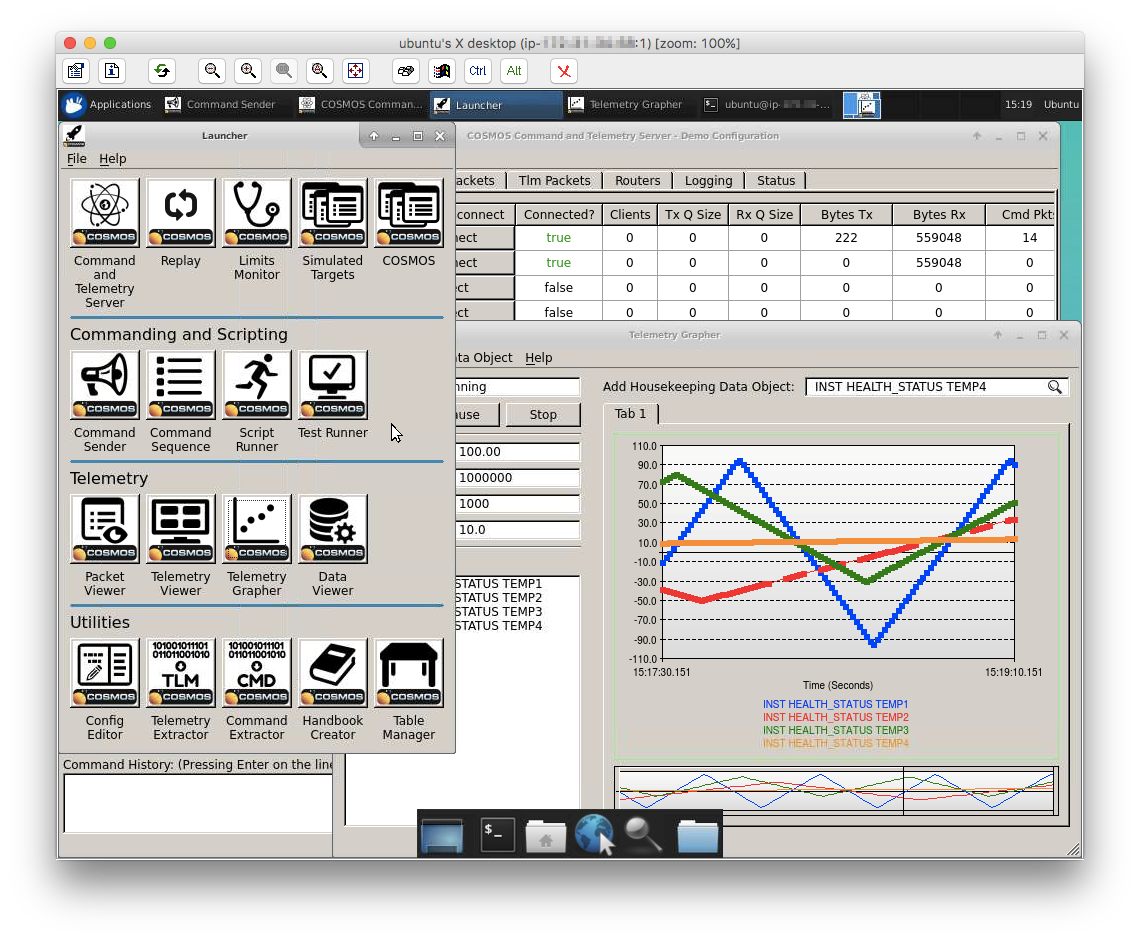
Chose the sudo option when asked how to install. On your local machine install a VNC viewer such as TightVNC and connect by entering the Public DNS address of your AWS instance in the Remote Host as well as the Port number of 5901. Typically this is added by appending it to the Remote Host address with a colon. Here is a screenshot of it running while I connected via TightVNC:
If you have a question which would benefit the community or find a possible bug please use our Github Issues.